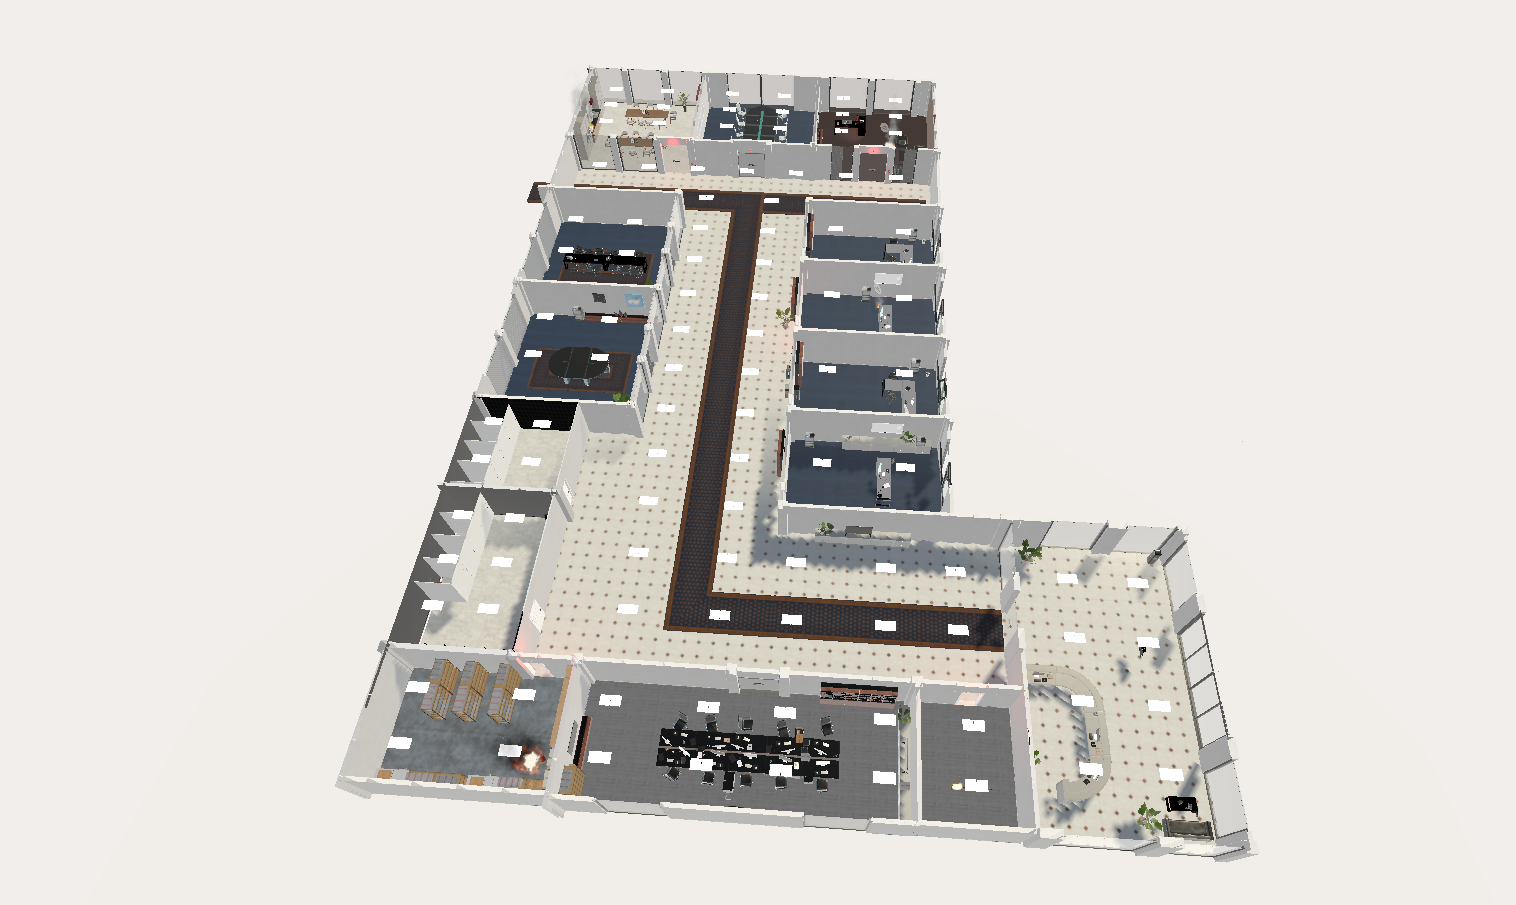
Main training environment
General information
SAVR is a startup company founded in 2022 and located at the University of Twente. The company specialises in the development of Virtual Reality training simulations. They are focused on creating and maintaining a comprehensive platform that enables businesses and Emergency Response trainers to provide their customers and employees with realistic and engaging training scenarios.
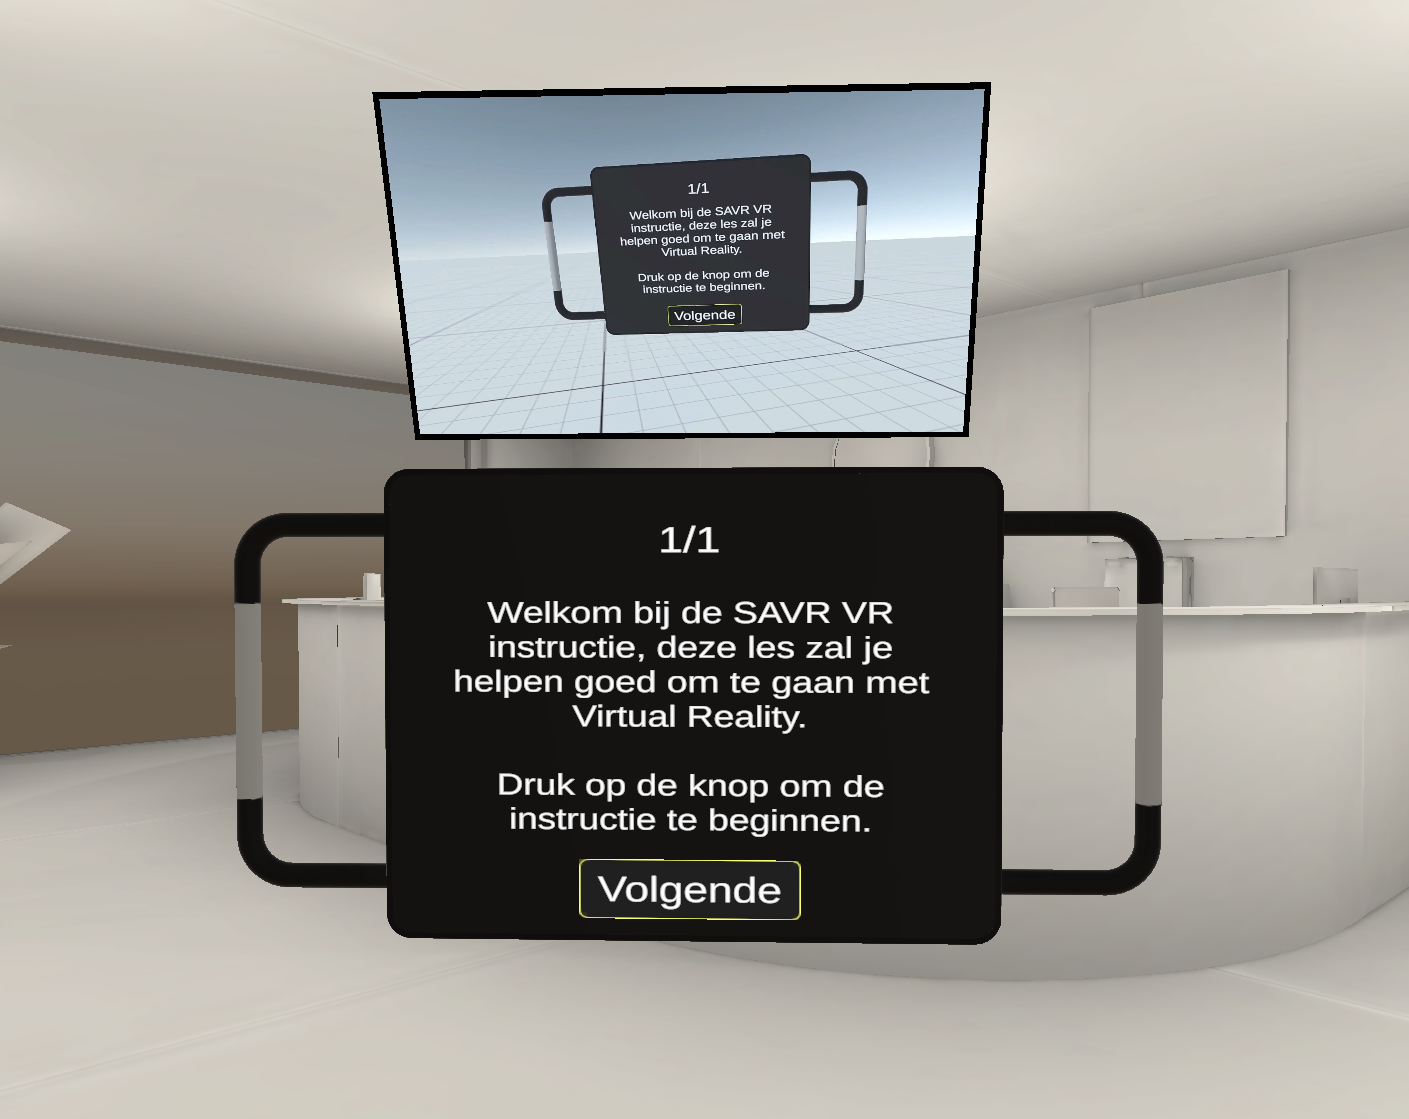
The software uses hand tracking in combination with the Quest 2 for player interaction.
Click here to go to the website of the company.
If the link doesn't work, try the full one: https://www.savr.nl/
If the link doesn't work, try the full one: https://www.savr.nl/
Internship period
January 2023 - July 2023
Project information
Role
My role during the internship was that of a Gameplay Programmer. This meant that I was responsible for the interaction between the player and the training environment, and the player's experience in general.
My part
- Debugging and Bug Fixing: I diligently identified and resolved issues within the VR training simulation, ensuring its smooth functionality and optimal user experience.
- Scene Development: Recognising the importance of user familiarity and comfort, I researched effective tutorial methods. Using my findings, I created tutorials that guide users through the application, helping them become proficient in utilising the VR training platform.
- Instructional and Promotional Videos: To aid users both within the application and online, I recorded and edited instructional and promotional videos. These videos provide step-by-step instructions and engaging content, enhancing user understanding and engagement.
- Plugin Implementation: I researched, modified, implemented, and integrated various plugins. Including the Auto Hand, Fluid Flow 2, Ignis, Paint in 3D, Lean Localisation, Curved Lines System and Curved UI plugins. These additions further enriched the immersive experience and functionality.
- Optimisation: To ensure optimal performance, I focused on texture, lighting, video and rendering optimisation. By employing efficient techniques, I strived to deliver a visually compelling and seamless experience to our users.
- Testing and Feedback: I actively participated in testing the application internally within our company and alongside clients. In addition, I also accompanied and engaged in sales pitches and customer meetings. This process allowed me to identify and address any remaining issues, validate the effectiveness of the simulation, and gather valuable feedback for further improvements.
- Customer Iterations: I proactively incorporated customer feedback and devised valuable additions to the project. These enhancements spanned a wide range, including the implementation of new code functionalities, refining user interactions, crafting intuitive UI screens, and more. By incorporating customer input, I ensured that our product continually evolved to meet the ever-changing needs and expectations of our users.
What did I learn?
- Adaptability: I have learnt to embrace change and be flexible in the face of evolving project requirements and deadlines. This has allowed me to quickly adjust my approach and find creative solutions when unexpected challenges arise.
- Collaboration: Working in a team environment has taught me the importance of effective communication and collaboration. I have learnt how to work harmoniously with colleagues, leveraging and using their expertise and contributing my own ideas to achieve the best possible outcome.
- Time management: Managing my time efficiently has been crucial in meeting project deadlines. I have improved my ability to prioritise tasks, set realistic goals and give accurate development time indications. Ensuring that I deliver high-quality work within the given timeframe.
- Problem-solving: Through various technical challenges encountered during the project, I have developed strong problem-solving skills. I have learnt to break down complex problems into smaller, more manageable tasks, analyse them systematically, and find effective solutions.
- Attention to detail: In the gaming industry, even the smallest oversight can have significant implications. I have learnt to pay attention to detail, thoroughly testing and debugging my code. Ensuring that I created a polished final product.
- Continuous learning: The ever-evolving nature of technology requires a mindset of continuous learning, especially with AI coming up. I have developed a desire for knowledge, actively seeking out new tools, techniques, and industry trends to stay ahead and improve my skills.
- Resilience: I have faced setbacks and encountered obstacles during the project, but I have learnt to persevere and maintain a positive and professional attitude. I now understand that failures and challenges are valuable learning opportunities that contribute to my personal growth.
- Self-reflection and improvement: Throughout the project, I have actively reflected on my strengths and weaknesses, seeking ways to improve and grow as a professional. I have sought out and embraced feedback and used it as a catalyst for self-improvement.
- User-centric approach: Creating a product that meets the needs and expectations of users is essential. I have learnt to understand and empathise with the end-users, gather feedback, and iterate on my work to deliver a user-centric experience.
Detailed showcase
World Canvas
During my internship, I have spent a lot of time working on different types of canvases.
The tablet is used to convey information and instructions to the user. This includes text, video, audio and button presses. The tablet can be grabbed at the sides and placed in the desired position.
Because the tablet sometimes confused the users, it was decided to create a completely new way to convey information. This replacement resulted in the creation of the world canvas. This is a canvas that is located in a static place in the scene and holds text, video, audio and physical pressable buttons. The UI scales itself to its contents.
Design of the tablet
The dynamic design of the world canvas
The content of the world canvas can be selected in the inspector view on the right. This view is an improved version of the tablet and will only show the variables that are related to your choice.
This canvas also supports header text, which is to improve readability for the user. This type of text also supports translatable phrases, which allows for switching between Dutch and English.
Setting the content of the world canvas
Scene Selection
To give the user more power with the scene selection, I created a menu where the user can scroll through different scenes and load them for themselves.
Showcase of the 'Scene Selection' menu
Showcase of the inspector behind the 'Scene Selection' menu
Extinguishers, Fires & Reactions
There are five different extinguishers and five different fires. Every fire has its own custom reaction for each extinguisher.
Showcase of the fire reactions
Every extinguisher has its own ID. This ID is passed onto the fire controller script when the particles of the extinguisher collide with the collider of the fire. The fire then checks which reaction should be triggered according to the fire type. This can be seen in the left video below.
In the trigger script, you can easily indicate which reaction should be triggered by which fire extinguisher by a dropdown menu. The associated script then needs to be linked to the effect. This effect can be seen in the right picture below.
The start, stay and stop collisions are triggered by the reaction type trigger script in the middle. This allows for customizable fire reactions. As can be seen below the on collision script, a custom reaction script can be seen. This takes care of the effect the fire needs to give.
Showcase on how to assign reactions to different extinguishers
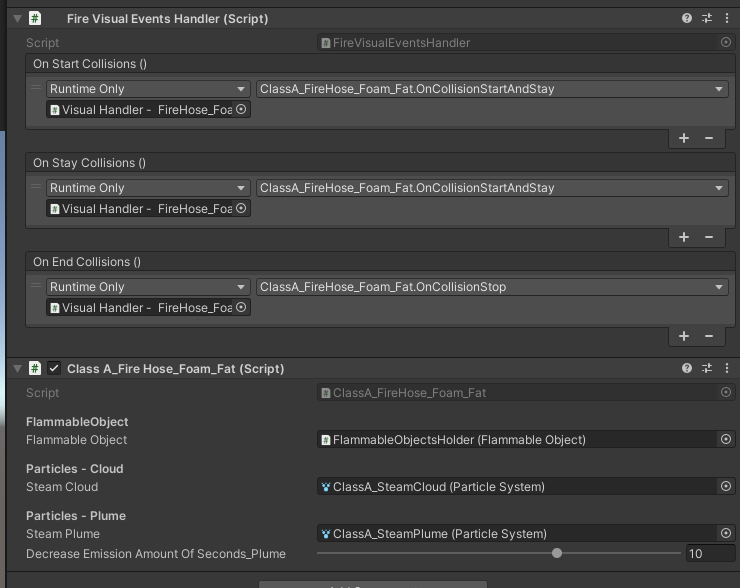
Inspector view of the reaction script
Editor Tools
We have the Mass Baker and Mass Compressor, both of which are created to speed up development and help optimise and simplify tasks.
MassBaker
The Mass Baker simplifies baking lighting and occlusion culling for multiple scenes. Usually, you have to press different buttons to bake lighting and occlusion culling. You then also have to keep an eye out and check on it in a while to see if the baking is finished. If it is finished, you have to load the next scene and repeat the same process. This can take up a lot of time.
This tool automates this process with one press of a button. You can drag and drop scenes in a list. The list only accepts scenes and nothing else. With the checkboxes on the right, you can indicate if you want to bake this lighting and/or occlusion culling. When pressing one of the boxes, more UI appears with the values that the scene has. You can then adjust these values to your liking. When you are done adjusting everything, you press bake and wait.
Showcase of the 'MassBaker' editor tool
MassCompressor
The Mass Compressor takes care of compression textures. Texture compression can take up a lot of time, since you have to select the textures yourself, select the correct settings and then apply them.
When you press ‘Compress!’, the tool will find all the textures in the project and compress them. If you only want a specific folder or multiple folders to be compressed, you can indicate it by checking the checkbox. A list will appear where you can drag and drop multiple folders.
If you then press ‘Compress!’, only the textures in these folders will be compressed.
Showcase of the 'MassCompressor' editor tool