Process
When I started this assignment, I honestly had no idea what I wanted to make. Most of my tinkering happens digitally, so switching to a physical "building block" took a moment. The idea clicked when I realised I had left my Ethernet adapter in Enschede, meaning I was stuck with slow Wi-Fi. I started browsing online for adapters, but I ran into two problems:
1. Many hubs are way too big and include outputs I don’t need.
2. A lot of them look like they’re straight from AliExpress, and I don’t love the idea of my peripherals turning into a fire hazard.
That’s when I came up with the concept: a hub you can build yourself. Instead of buying one large all-in-one dock, you click together the modules you actually need.
Technical hurdle
Design a safe, modular building block that can carry high-speed power + high-speed data in a way that’s:
- easy to expand (modules click on),
- reliable (stable connection), and
- safe (low risk of overheating, short circuits, etc.).
Design iteration storyline
Before arriving at the current concept, I went through three design iterations. Writing them out explicitly makes the design process clearer than only showing the final module.
Iteration 1 - All-in-one hub
My first instinct was not actually a building block system, but a more conventional all-in-one dock. That idea solved the practical problem of missing ports, but it did not really invite tinkering. It would mainly be one fixed object with many functions packed into it.
Iteration 2 - Modular dock with specialised modules
The second iteration shifted from one fixed hub to a modular system. Instead of forcing every user to buy one oversized dock, I explored separate modules for USB, Ethernet, display output, charging, and audio. This was the first moment where the concept became more like a building block system rather than just a product.
Iteration 3 - Modular dock with one shared connection language
The third iteration is the version shown in this assignment. Here, the key design move was not only to separate functions into modules, but to make all modules part of one shared connection language: one base hub, one repeated connector logic, and multiple modules that can be added, removed, and reordered. This made the concept more coherent and more tinkerable, because the focus moved from "which ports do I need?" to "how can I build the setup I want?"
To compare these iterations, I used four criteria:
1. Clarity: Is it obvious how the system works?
2. Expandability: Can new functions be added later?
3. Reconfigurability: Can users change the setup without rebuilding everything?
4. Safety/Reliability: Does the concept still feel realistic for power and high-speed data?
Using those criteria helped me move away from a single polished device and towards a concept that is more in line with the goal of designing a tangible system for exploration rather than a one-shot solution.
Context
Figure 1 - Base hub (the "anchor")
I started with the main piece: the base hub. This is the anchor that connects to the laptop/PC.
Main connection: one Thunderbolt 5 USB-C cable to the laptop/PC.
I considered using two USB-C cables, because combining a lot of data + power in one cable can sound "heavy". After researching, I decided one cable is sufficient and much cleaner for daily use. If later testing shows a second cable is needed (for extreme setups), that can be a future iteration.
Separate power input: the base hub also has a dedicated power-in port.
This allows a stronger external adapter to supply the whole system. That matters when you add more modules (high-power charging, screens, etc.), and it avoids pulling extra power from the laptop.
Core ports: I included SD + microSD readers as default basics (nice to have from a photographer's perspective).
I’m still debating whether Ethernet should be part of the base or always be a module. For now, I kept it in the base hub because (1) Ethernet is one of the main reasons people buy hubs, and (2) it keeps the "main input cables" grouped. This could still change later.
Replacement USB-C ports: because one USB-C goes to the laptop, I added two USB-C ports on the hub to compensate.
Status screen: on top of the base is a small screen that can show useful hub info, such as power usage, temperature, internet status, and which modules are connected.
This base hub is designed to be expanded with click-on modules (see below).
Figure 2 - The building block connection (magnets + pins)
To make the system modular, I explored different connection options. A pin-based connector is the most modular for this use case.
Magnetic click: strong magnets in each corner pull modules into place.
Safe contacts: the electrical contacts are recessed, so you don’t touch exposed conductors.
Split pins: the 8 pins are divided into power (left) and data (right).
The goal is a connection that is easy to use, but still stable for both power and data transfer.
Figure 3 - USB expansion module
This was the first module I designed, because USB ports are the "base need" of most hubs.
- Front: 4x USB-C
- Back: 4x USB-A
This gives the user enough ports for peripherals. I also considered adding small numbered indicator lights to show which ports are active/connected correctly. All ports support high-speed charging and data transfer to/from the main device.
Figure 4 - Ethernet module
Cabled internet is still a must-have, especially with bigger downloads and more streaming.
This module is intentionally small: it mainly contains an RJ45 Ethernet port (with the option for link/activity LEDs). Whether this module stays depends on the earlier decision: Ethernet in the base hub, or always modular.
Figure 5 - HDMI + DisplayPort module
Some laptops don’t include HDMI, and multi-monitor setups are common.
This module provides:
- 2x HDMI for broad compatibility
- 2x DisplayPort for users with newer monitors and higher performance needs
Figure 6 - Wireless charging module
If the hub is used at a desk, a phone charger is a useful "comfort" module.
This module supports MagSafe, so an iPhone can snap on and won’t slide off. It’s physically larger than other modules (a phone has to fit), so I use the extra space for cooling and thermal monitoring to prevent overheating.
Figure 7 - Watch charging module
This module is aimed at Apple Watch users, but is not limited to it. The idea is that the charger puck/insert is swappable, so other watch chargers can fit too.
Figure 8 - Extension link module (flex cable)
If the hub becomes large or if the user wants modules placed across their desk, an extension connection becomes useful.
This module is basically a high-speed link available in multiple lengths, designed to keep both fast data and power delivery intact.
Figure 9 - Audio module (for editing/production)
As a video editor, audio matters a lot, and it’s annoying when a device lacks the right inputs.
This module includes:
- RCA output
- Balanced audio ports
- Optical input
Plus three knobs for controlling the input types, and a display that shows audio levels.
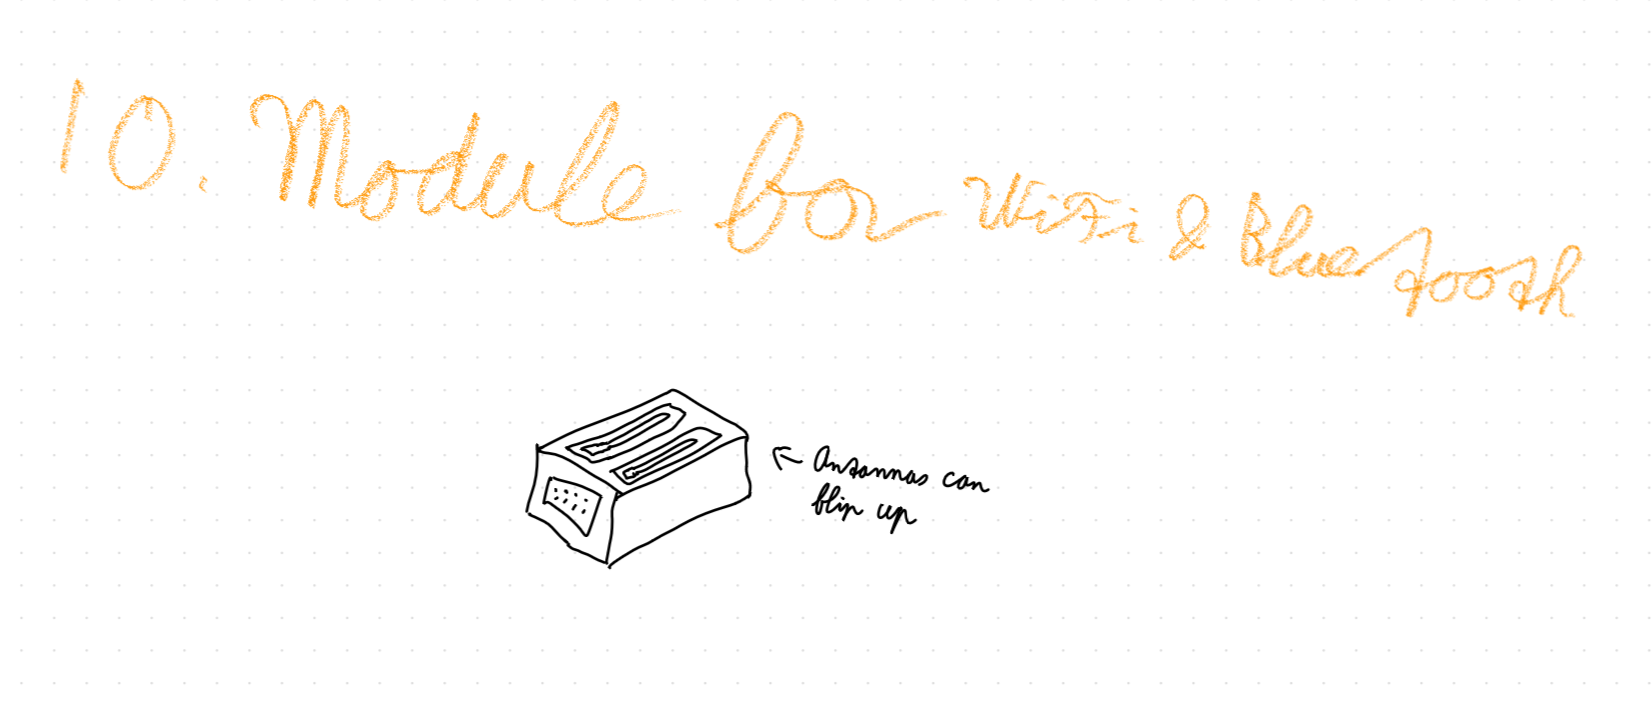
Figure 10 - Wireless connectivity module
For users who can’t use Ethernet (or want extra range), this module adds Wi-Fi and Bluetooth with the goal of improving wireless stability and range at a desk setup.
Quality & Versions
Because safety and reliability matter (and because I don’t want a "burst into flames" dock), this concept assumes high-quality materials, protection, and modern connectivity. That likely makes it expensive, but it should match the performance and safety expectations.
Versions
The versions below are the current high-end interface standards I’m targeting for this dock concept (as of early 2026), depending on chipset and certified cable support.
- USB-C type is USB4 Version 2.0
- USB-C charging type is USB Power Delivery 3.1 (up to 240W / EPR)
- USB-A type is USB 3.2 Gen 2 (SuperSpeed USB 10Gbps)
- HDMI type is HDMI 2.2 (Ultra96, up to 96Gbps)
- DisplayPort type is DisplayPort 2.1b (UHBR20, up to 80Gbps)
- Ethernet type is 10GBASE-T (10GbE, IEEE 802.3an)
- Wi-Fi type is Wi-Fi 7 (IEEE 802.11be)
- Bluetooth type is Bluetooth Core Specification 6.0 (Bluetooth 6.0)

Figure 1. The base hub.
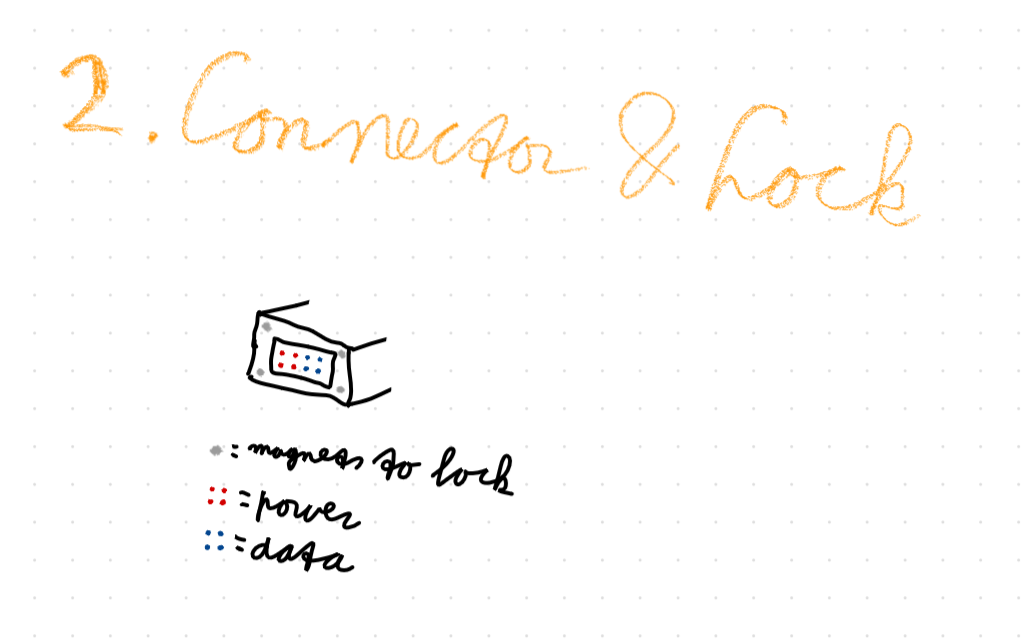
Figure 2. The connector and lock system.
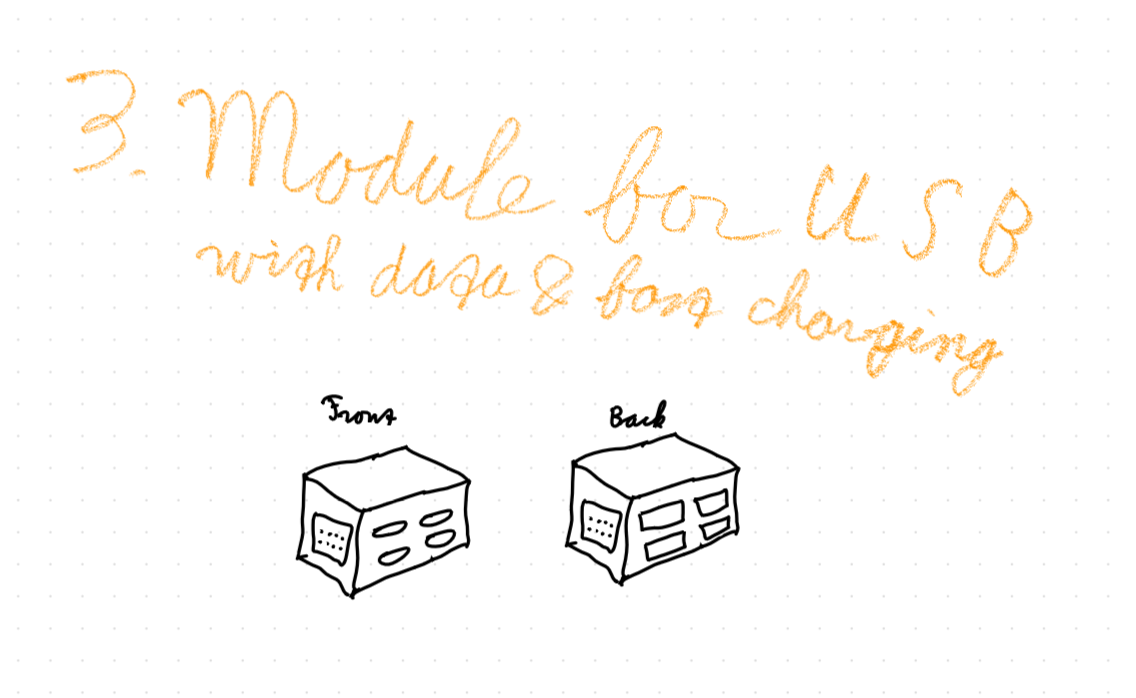
Figure 3. The module for USB peripherals.
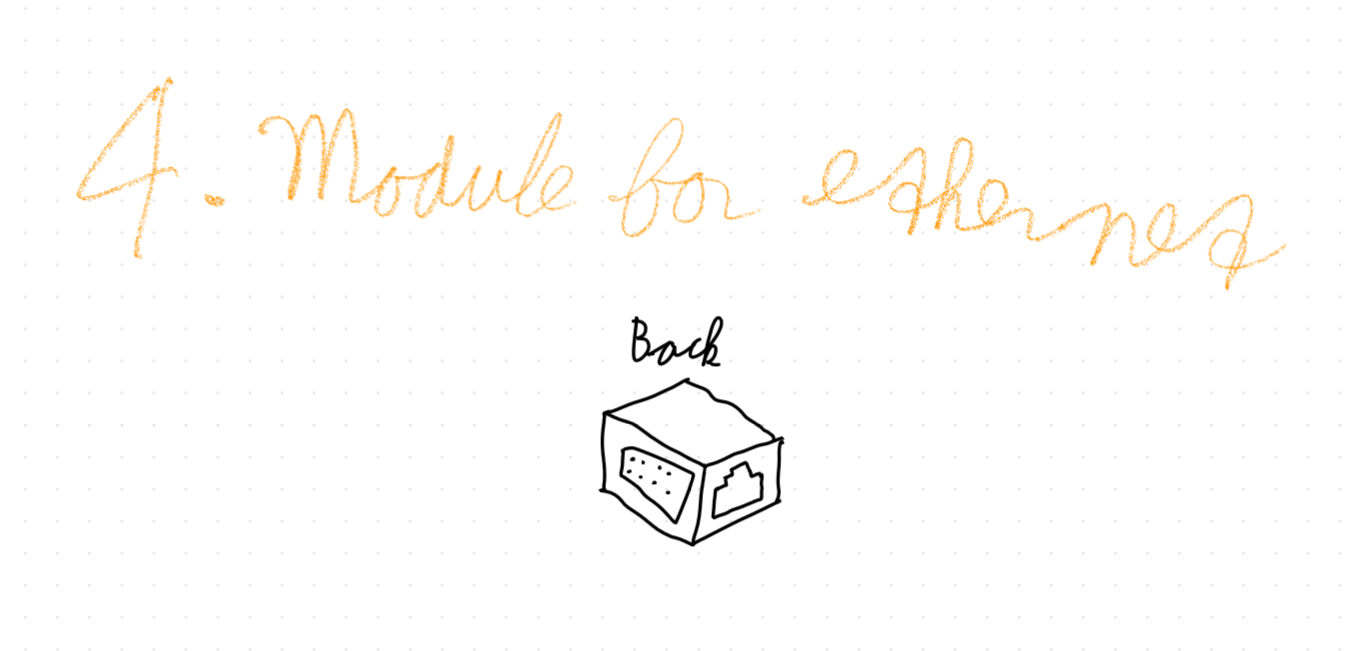
Figure 4. The module for an ethernet connection.
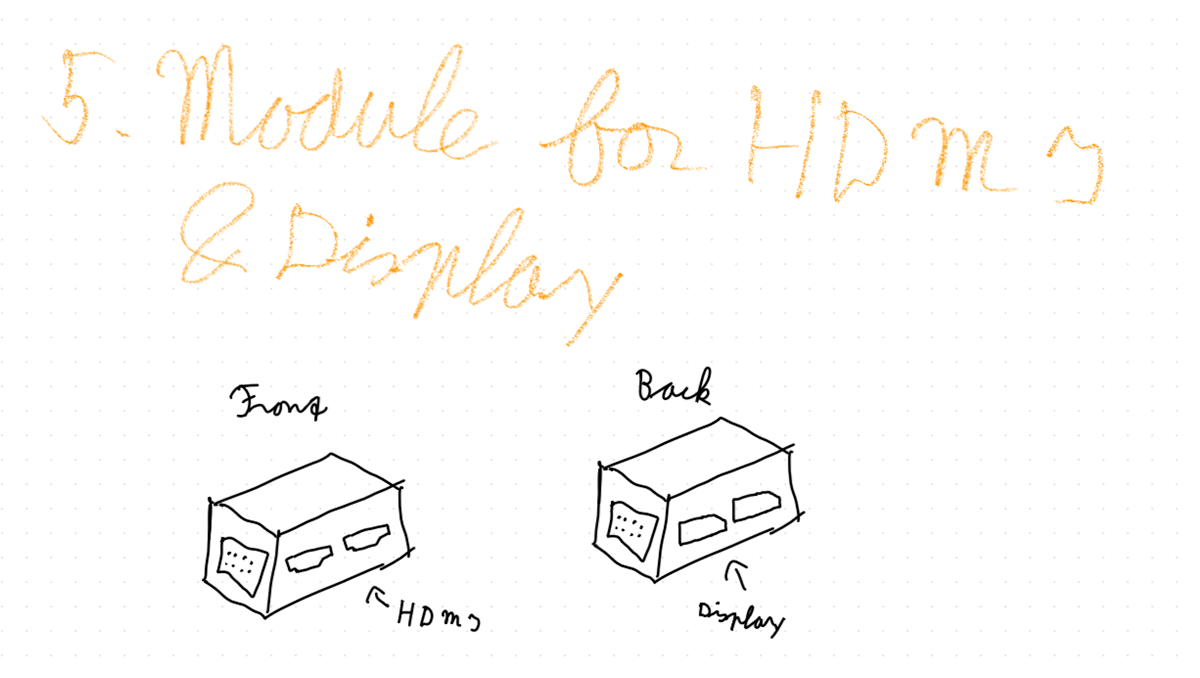
Figure 5. The module for the HDMI and Display ports.
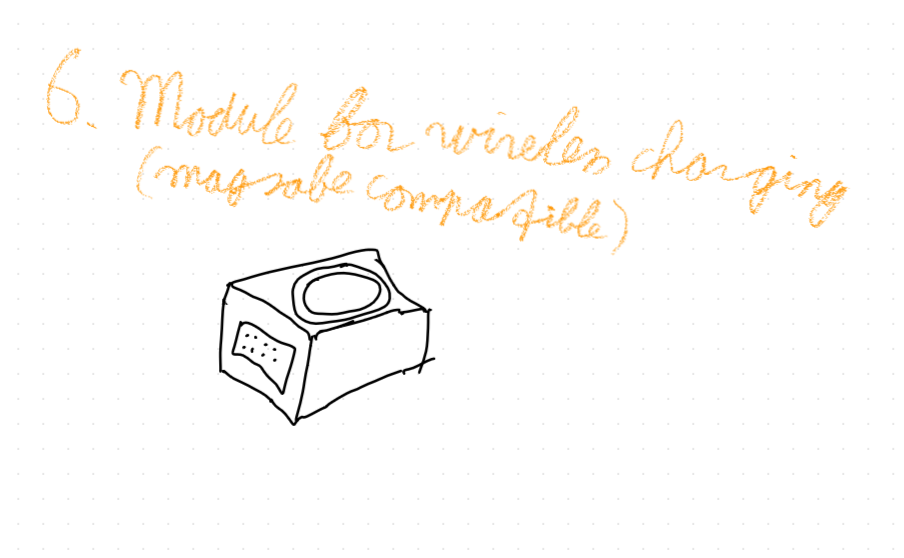
Figure 6. The module for wireless charging.
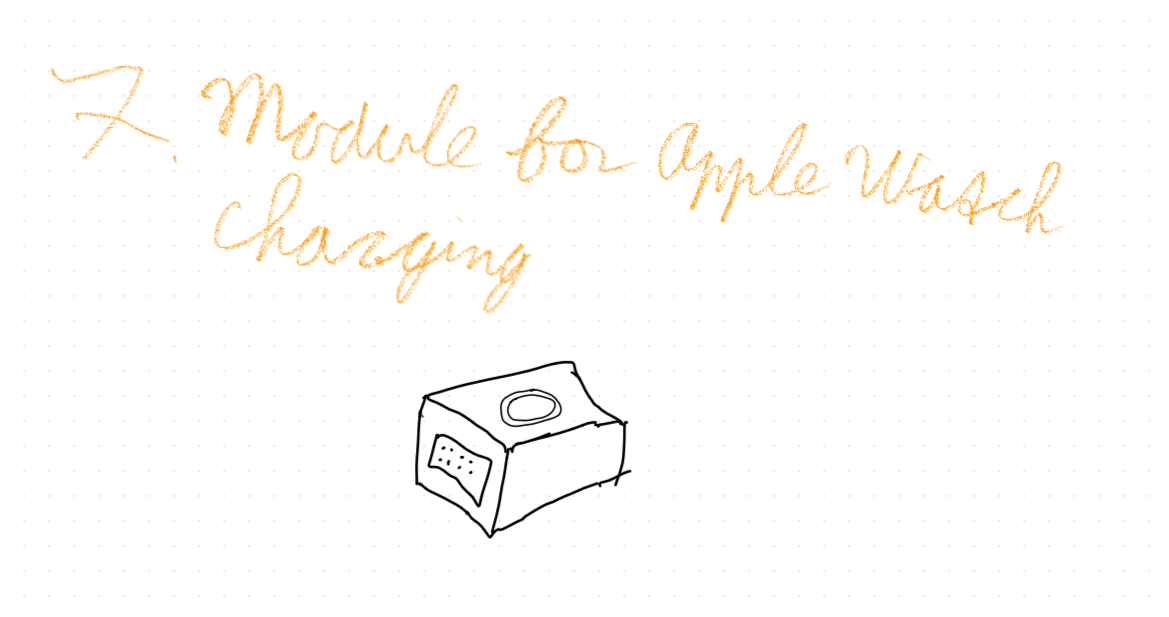
Figure 7. The module for Apple Watch charging.
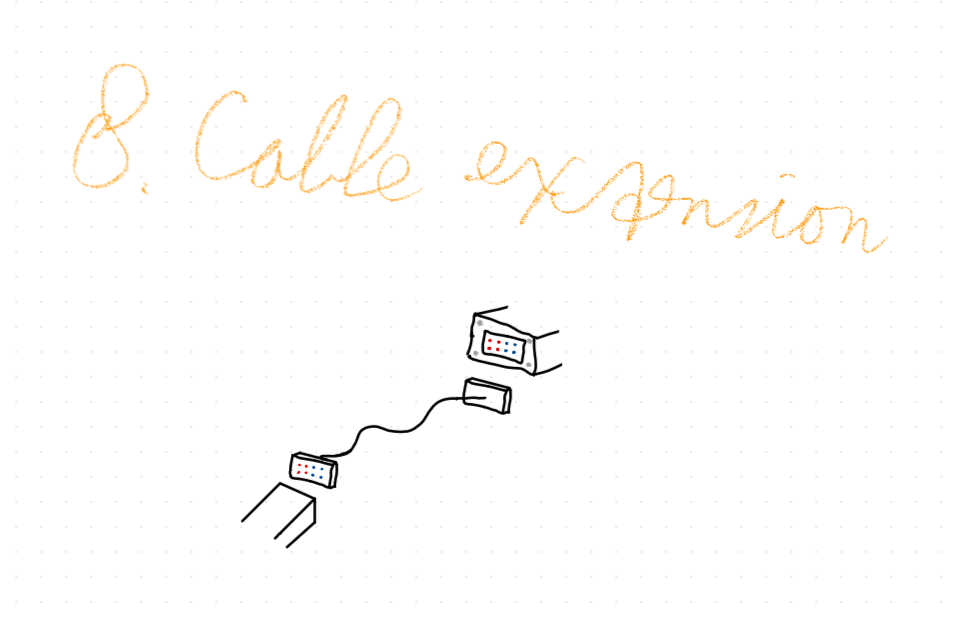
Figure 8. The module for a cable extension.
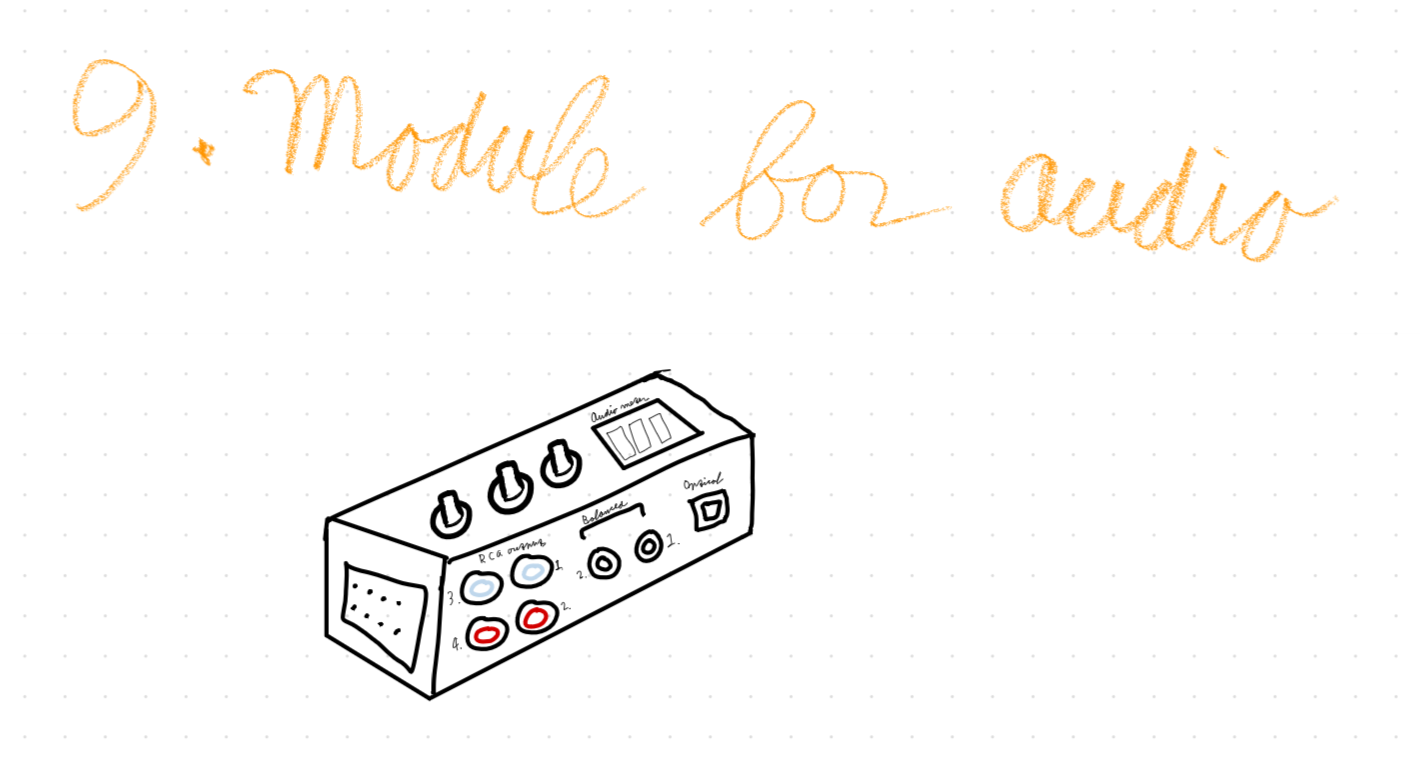
Figure 9. The module for audio input.